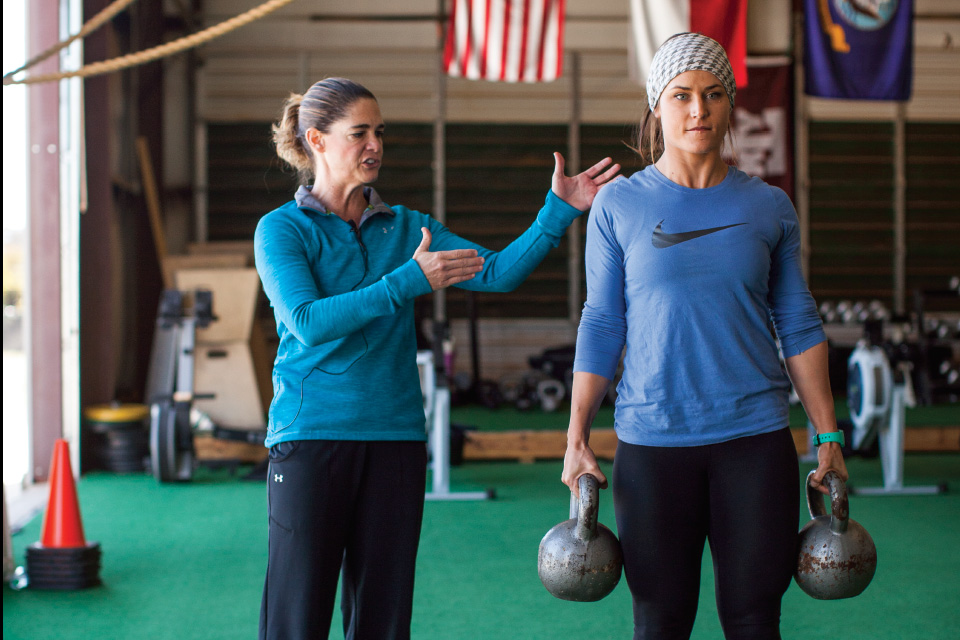
Engage the Lower Body to Enhance Upper Body Stability

Based on the video by Diane Vives, M.S., C.S.C.S., N.S.C.A.-C.P.T.
This month, Diane Vives is at Of the Lion Fitness in North Austin with Head Boot Camp Trainer Courtney Carlisle, who is demonstrating the movements. This series of exercises is designed to focus on improving and strengthening shoulder stability to help those with shoulder weakness progress toward more dynamic movements.
Rear Elevated Split Squat

Why: build strength and power through single leg, lower body isolated movement
What You Need: 1 Kettlebell; 1 Plyobox
Starting Position: With Plyobox positioned 1–2 feet behind you, stand with left foot to left of Kettlebell and right foot behind Kettlebell.
Motion:
Maintaining a straight back, grab Kettlebell with both hands, and lift to shoulder height. Glancing over right shoulder at Plyobox, lift right leg so top of right foot rests on box.
Pushing weight into your left standing foot, squat until left thigh is parallel with floor and right knee is pointing directly down at the ground.
Keep your torso upright and spine in line throughout squat. Kettlebell should remain at shoulder height. Hold for 3–5 seconds.
Release squat and straighten left leg to standing. Bring right foot back to standing and, keeping a straight back, lower Kettlebell to floor.
Want a guided look at these movements? For a more detailed look in action, check out the workout video.
Farmer’s Walk

Why: work grip and static motor control to activate shoulder complex for stability
What You Need: 2 Kettlebells
Starting position: Place Kettlebells slightly more than hip-width distance apart on floor. Position feet hip-width distance apart along the insides of Kettlebells, with outer edges of left and right foot touching the inside of left and right Kettlebell, respectively.
Motion:
Keeping arms at your sides, and maintaining a straight spine, sit back into squat as though sitting back into a chair.
Grip one Kettlebell in each hand and lift straight up to standing. Shoulders stay back and down. Arms are down at sides.
Take a few nice and controlled steps forward, maintaining shoulder alignment and fighting the urge to drop one shoulder or the other forward.
Reverse process, taking controlled steps back.
Squat and release Kettlebells to their starting position on floor.
Supine Core Strengthening Twist

Why: to enhance core strength
What You Need: a flat surface floor
Starting position: Lie down on back, legs stretched out straight like a pencil. Stretch arms out at your sides at shoulder height, forming a “T” with your body. Make sure your lower spine, as well as your shoulders, is resting and in contact with the floor.
Motion:
With right palm open to the ceiling and left palm facing the ground, use your core muscles to lift and extend your legs straight up to the sky—forming a 90–degree angle between your lower body and your upper body.
Maintaining contact between your right shoulder and the floor, start to trace your legs across the ceiling and down toward your left side body, stopping when your right shoulder starts to lift up off the ground. There should be no movement in the upper body.
Bring your legs back to center, engaging your core muscles to keep them strong, straight, and extended.
Reverse the process, flipping your left palm open to the ceiling and right palm toward the ground. Start to trace your legs across the ceiling and down toward your right side body, stopping when your left shoulder starts to lift up off the ground.
Return to center.
Metabolic Blast

Why: work rotary stability by disassociating the upper and lower body
What You Need: agility ladder; low weight medicine ball
Starting position: Stand at start of agility ladder with shoulders, hips, and feet facing forward; biceps should be down at sides; palms face up as though serving a platter; low-weight medicine ball is held out at chest height.
Motion:
Keeping shoulders squared and facing forward, activate core muscles (instead of shoulders) to turn lower body.
Maintain a good pace as you make a 90–degree turn with your lower body, the left foot landing in the agility ladder as you move toward the left side of the room.
After reaching the end of agility ladder, reverse the process, making a 90–degree turn with your lower body, this time with the right foot landing in the agility ladder as you move back toward the right side of the room.


